
In this article, we will show you how to use Mentorica.AI’s instructor portal to easily configure AI activities and assign them to your students (individually or in groups).
If you haven’t already, please register for a free instructor account on our instructor portal. Upon first login, you will notice a “DEMO101” course waiting for you, and the “Global Bank” AI activity already selected. This DEMO101 does not involve any real students, and is there to help you get familiar with the instructor portal. We will also use it for illustration here.
Configure an AI Activity
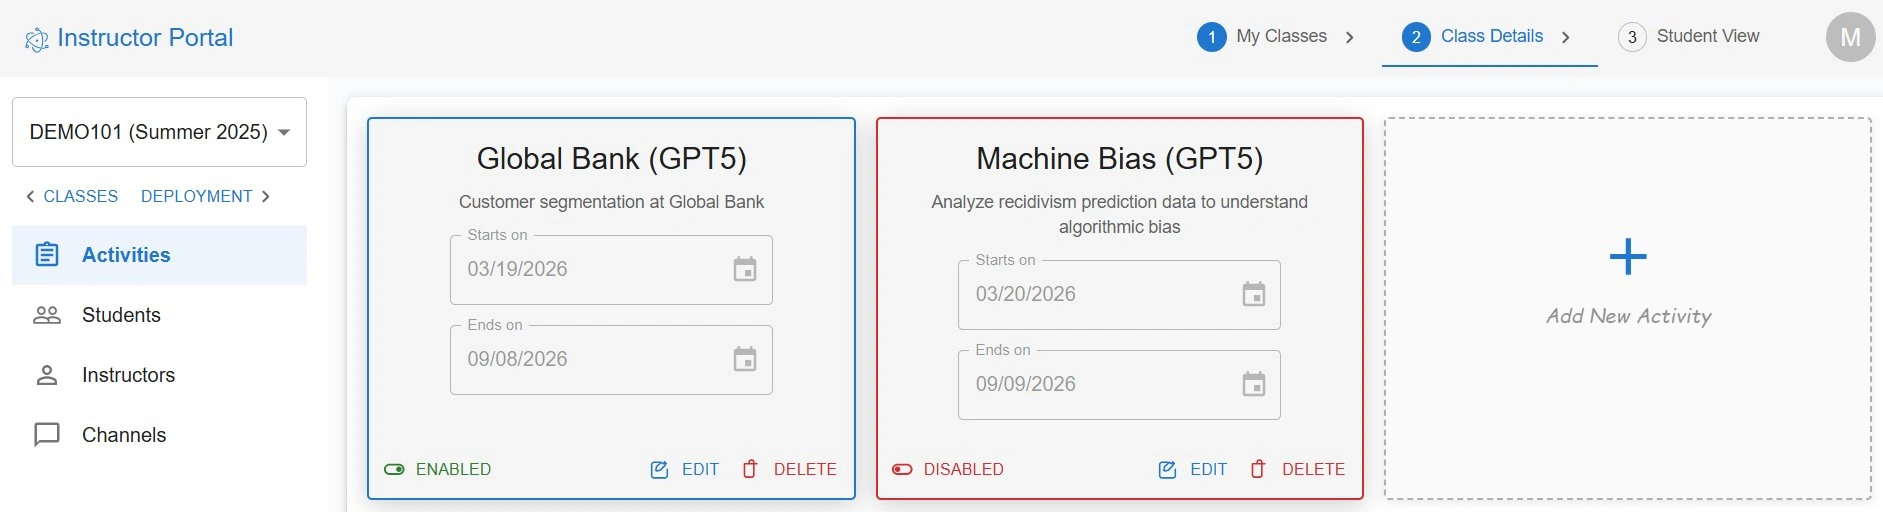
All AI activities can be managed under the “Class Details” page for a given course. Take the “Global Bank” case as an example (see screenshot below), you have several configuration options:
- The “ENABLED/DISABLED” toggle: this controls the visibility of this AI activity for your students. Switching an AI activity to the “Enabled” state would make that AI activity immediately available and visible to your students. Please note that a activity will automatically be toggled to the “Enabled” state on the specified start date of your activity and to the “Disabled” state on the specified end date.
- The “EDIT” button: The pop-up window is where you can specify the desired start and end dates for this AI activity, as well as whether it should be assigned to individual students or student teams. For our pre-configured AI activities, you won’t be able to modify the name or description.
- The “DELETE” button allows you to delete an AI activity altogether.
- Moerover, directly clicking on the AI activity card will take you to your private chatting channel with that activity, where you can interact with the AI agent for testing and demo purposes.
- If we have deployed custom AI activities for your course, they can be found in the same place as Mentorica’s curated AI activities. Your custom AI activities are only visible to you.
Chat with AI
Often times, you want to have a chat with an AI agent in a case to test how it behaves or as a demo to your students. You can do so without leaving the instructor portal. The “Student View” tab (top right corner) is designed exactly for this purpose. It allows you to view your own course and chat with the AI activities you have enabled as if you are a student (similar to the “Student View” feature on Canvas).
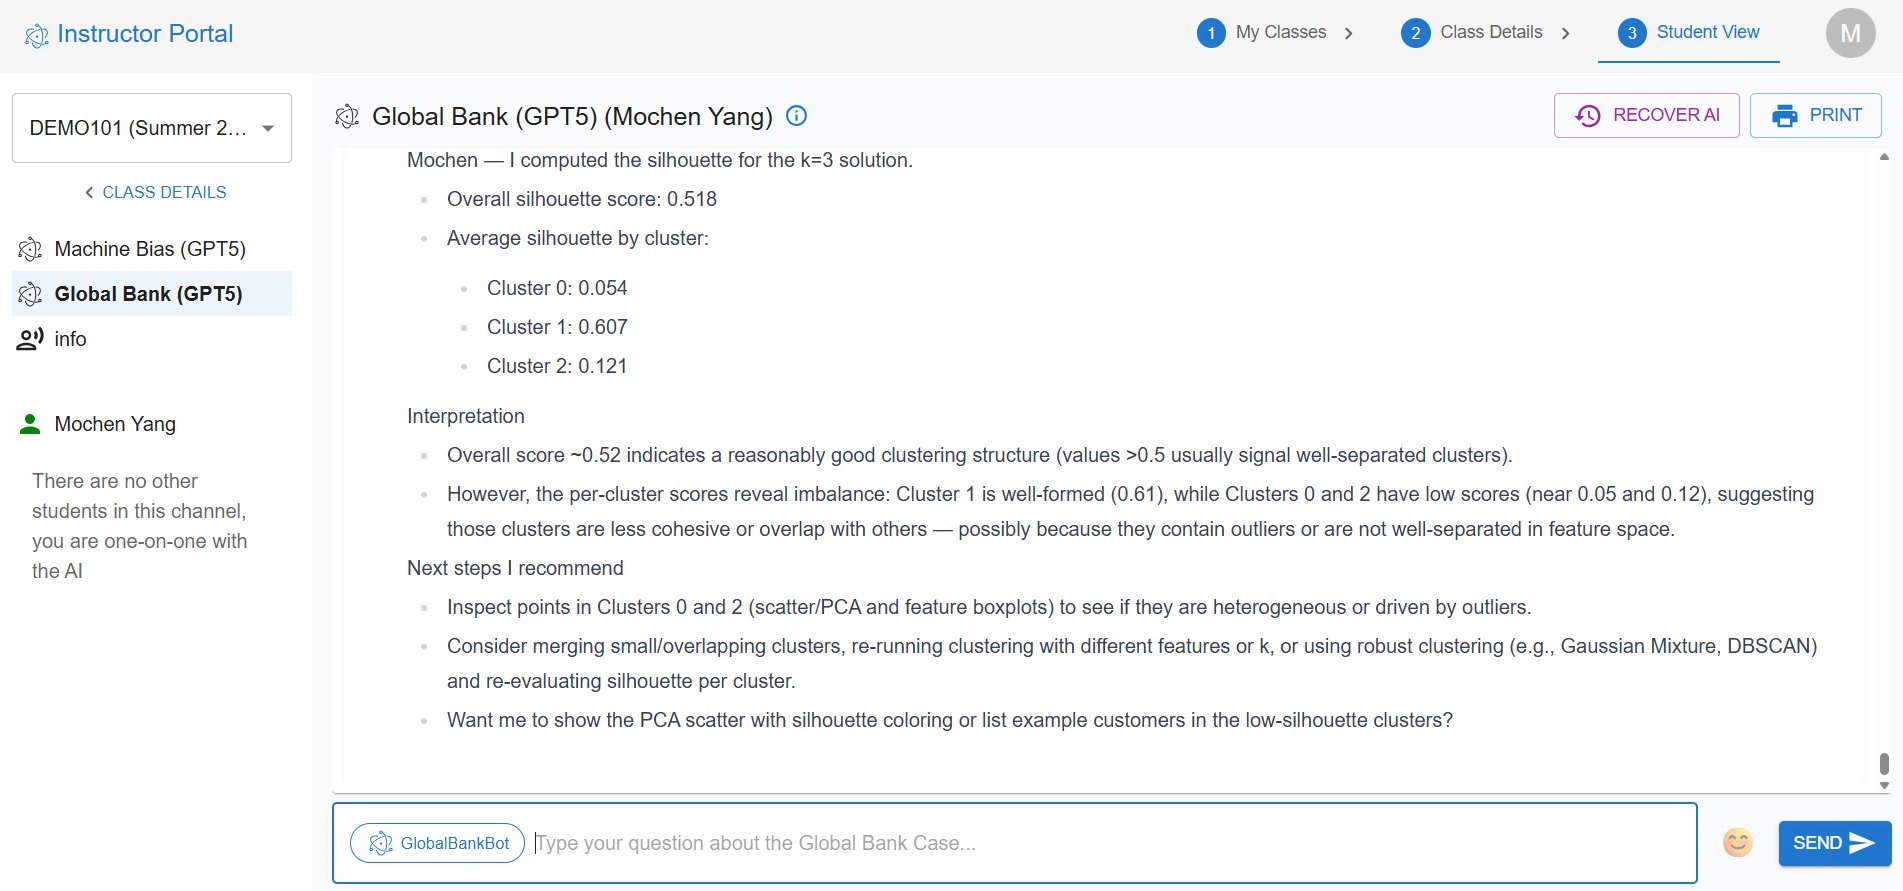
If you click on the info icon (🛈) right next to channel name, you will be able to access the learning objective, case description, teaching note, and supplemental materials (e.g., the dataset associated with the case). The teaching note is only visible to you (as the instructor), whereas the other case materials are also available to your students (in their student portal).
The chat interface also has a “Recover AI” button and a “Print” button.
- The “Recover AI” button: sometimes, the AI agent might get “stuck” on a request due to glitches in OpenAI’s service. For example, the AI agent may tell you that “it has lost access to the data or coding environment” or even ask you to “upload the data files” (which you do not need to do). We have already implemented automatic recovery mechanisms to reduce disruptions to your learning experiences. In rare instances when automatic recovery does not address the problem, you can click this button to issue a manual recovery. This will reset the underlying OpenAI Assistant, re-install required data files and re-implant the memory of this conversation.
- The “Print” button will export all the historical messages in the current channel into a PDF file. This allow you to save your conversations with the AI.
Assign an AI Activity
The first step to assign an AI activity is to enter your student roster into the course, which you can do under the “Students” tab. You can either enter students manually or import a csv file (template can be found next to the import button) with the following fields:
- Email: The email address that a student intends to use (e.g., the student’s University email). IMPORTANT: our system uses the email address as the unique identifier for a student. Once entered, the student has to use that email address when logging into the student portal, and you cannot edit it. If a student wants to use a different email than the one already in the system, you need to delete and then re-enter that student under the desired email address.
- Name: Last name and first name, separated by a comma. E.g., “Yang, Mochen”
- Group: If you’d like assign AI activities to student groups, you can specify the group names here. This field is optional – if you leave it empty, AI activities will be assigned to each student individually. If you have specified a group set, all AI activities will be assigned at the group level by default, unless you explicitly toggle the “Individual Activity” control for the AI activities that you wish to keep at individual level.
Related to entering student information, you can also invite co-instructors or teaching assistants to your course. This is done under the “Instructors” tab, which has a very similar interface as the “Student” tab. The only difference is that you cannot specify any grouping for co-instructors or TAs – AI activities will be assigned to each instructor or TA individually.
Monitor Student Activities
Under the “Channels” tab, you will be able to see the chatting channels for yourself (and any other co-instructors or TAs) as well as all your students. Simply click on a row to see what a student has been doing with an AI activity. Please be aware that with many students / AI activities, there will be a large number of channels under this tab (e.g., a course with 50 students and 2 individual-level AI activities would already create 100 chat channels). You can easily filter channels by channel name, group, or student name, using the filter function embedded in the table header. We will roll out some AI-driven reporting tools (e.g., channel-level summaries) in the near future!
Get Usage Statistics and Learning Insights
Under the “Analytics” tab, you can view the current usage statistics of your course, including total number of messages, average number of messages per channel or per user, as well as a bar chart showing usage over time.
Furthermore, we also offer an AI-based summary for each channel, which systematically evaluate student prompts in that channel on several dimensions of learning effectiveness. To obtain an AI summary, go to the “Channels” tab, locate the row for the target channel, and click on the “Generate channel report” icon at the end of that row. Generating a channel report may take some time, especially if there are a large number of messages in the channel. Once completed, you can view the channel report by clicking on the magnifying glass icon.